Avoiding residential plumbing problems is crucial for the comfort and safety of any home. Many homeowners encounter a variety of common issues that can disrupt daily life and even lead to significant water damage if not addressed promptly.
Understanding these frequent residential plumbing problems can help in early detection and quick resolution, saving time, money, and stress. From dripping faucets to clogged drains, each issue requires specific knowledge and handling techniques.
This article will explore the seven most common residential plumbing problems, providing insights on their causes, how to identify them, and effective solutions.
1. The Annoyance and Expense of Dripping Faucets: A Guide to Stopping the Drip
That persistent drip, drip, drip from your faucet can be more than just annoying. It can also be costing you money. Let’s explore what causes faucets to drip and how to address the issue.
Why Does My Faucet Drip?
The most common culprit behind a dripping faucet is worn-out washers or O-rings. These are the small seals that create a watertight fit within the faucet. Over time, due to constant friction and exposure to water, these washers and O-rings can deteriorate, allowing tiny leaks to develop.
Here’s a breakdown of the common causes:
- Worn-out washer: In a faucet with a washer, the washer sits against the valve seat to form a seal. When the washer wears out, the seal loosens, and water seeps through.
- Deteriorated O-ring: O-rings are used in cartridge faucets to create a seal between the cartridge and the faucet body. Over time, O-rings can lose their elasticity and allow water to leak.
How Much Money Does a Dripping Faucet Waste?
Even a small drip can waste a surprising amount of water. A faucet dripping at a rate of one drip per second can waste gallons of water per day! This translates to higher water bills.
Here’s a quick calculation to illustrate the potential impact:
- One drip per second = 60 drips per minute
- 60 drips/minute * 60 minutes/hour = 3600 drips/hour
- Assuming each drip is about 1/19th of a teaspoon (a typical estimate), then 3600 drips/hour * (1/19 teaspoons/drip) = 189.47 teaspoons/hour
- There are 3 teaspoons in 1 tablespoon, so 189.47 teaspoons/hour translates to 63.16 tablespoons/hour
- There are 16 tablespoons in a cup, so 63.16 tablespoons/hour translates to 3.95 cups/hour
This is just an example, and the actual amount of water wasted will depend on the severity of the drip. However, it highlights how even a minor drip can add up over time.
Fixing the Drip: DIY or Call a Pro?
For some handy homeowners, fixing a dripping faucet is a straightforward task. If you’re comfortable with basic plumbing tasks, you can usually purchase a faucet repair kit from your local hardware store. The kit will include replacement washers or O-rings, and likely instructions specific to your faucet type.
However, if you’re not comfortable tackling the job yourself, or if the leak seems more complex, it’s best to call a professional plumber. They have the expertise and tools to diagnose the problem and fix the leak quickly and efficiently.
Here’s a guideline to help you decide:
- DIY: If the leak is minor and you’re comfortable with basic plumbing tasks, then a DIY repair might be suitable. Having the right tools helps.
- Call a Pro: If the leak is severe, you’re not comfortable working with plumbing, or if the faucet has a complex design, then call a professional plumber.
By addressing a dripping faucet can save money on your water bill and prevent further damage to your plumbing system.
2. Don’t Let Your Home Spring a Leak: Identifying and Addressing Leaky Pipes
Leaky pipes – those pesky drips and trickles – can be more than just an annoyance. Left unaddressed, they can lead to wasted water, mold growth, and even structural damage. This blog post will equip you to identify the culprits behind leaky pipes, the telltale signs of trouble, and the best course of action.
Behind the Drip: Common Causes of Leaky Pipes
Several factors can contribute to a leaky pipe:
- Corrosion: Over time, pipes can deteriorate due to exposure to minerals in hard water or acidic soil. This weakens the pipe walls, making them prone to leaks.
- Joint Damage: Joints, where pipes connect, are particularly vulnerable. Settling of the foundation, loose fittings, or improper installation can all lead to leaky connections.
- Frozen Pipes: When water freezes, it expands, putting immense pressure on pipes. This pressure can cause pipes to burst, leading to significant leaks. Learn more on preventing or thawing frozen pipes.
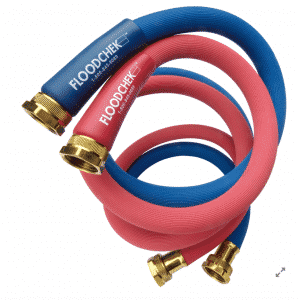
- Appliance Wear and Tear: Washing machines, dishwashers, and water heaters all have hoses that can deteriorate over time, springing leaks at the connections.
Residential Plumbing Problems: How to Identify Leaky Pipes
Early detection is key to preventing major damage. Here’s what to watch out for:
- Water Stains: Discolored patches on walls, ceilings, or floors can indicate a leak behind the surface.
- Mold Growth: A musty odor or visible mold growth often points to a hidden leak creating a damp environment.
- Unexplained Increase in Water Bills: A sudden rise in your water bill can be a sign of a leak wasting water behind the scenes.
- Sounds of Running Water: Even when no faucets are running, a persistent dripping or trickling sound can indicate a leak.
Temporary Fixes vs. Professional Repairs
While there are temporary DIY solutions for minor leaks, like using a pipe clamp or patching compound (found at most hardware stores), these are just stopgap measures. For a permanent solution, calling a professional plumber is crucial.Here’s why:
- Expertise and Tools: Professional plumbers have the experience and specialized tools to diagnose the exact source of the leak and implement a long-lasting repair.
- Safety: Some leaks involve hot water lines or gas lines, which can be dangerous for DIY repairs.
- Warranty: Professional repairs often come with a warranty, giving you peace of mind.
Don’t Wait for a Tiny Drip to Become a Major Headache
By understanding the causes of leaky pipes, being vigilant for signs of trouble, and calling a PDM professional for repairs, you can keep your home safe and sound. For more information on common water leak causes, you can visit this helpful resource: Water Leak Causes.
3. Don’t Let Your Money Run Down the Drain: How to Fix a Running Toilet
EPA studies have shown 40 percent of toilets leak. Have you ever heard a faint trickle or hiss coming from your toilet even when it hasn’t been flushed? But many leaks are silent. Both are sounds of money literally going down the drain! A running toilet is a common plumbing problem that can waste a significant amount of water, leading to higher water bills and placing a strain on our precious resources.
Why is My Toilet Running?
There are three main culprits behind a running toilet:
- Flapper Valve: This rubber seal sits at the bottom of the tank and holds water in the bowl. Over time, the flapper can wear out, crack, or become misaligned, allowing water to leak constantly into the bowl.
- Fill Valve Leak: The fill valve is responsible for refilling the tank after a flush. A faulty fill valve can malfunction and continue to fill the tank even when it’s already full, causing overflow and wasted water.
- Improper Float Height: The float is a device that tells the fill valve to shut off when the tank is full. If the float is too high, the tank won’t fill enough to trigger a proper flush, and the fill valve may keep running in an attempt to reach the correct level.
DIY Fixes for a Running Toilet
Before you call a plumber, there are a few DIY fixes you can try to tackle a running toilet. Remember, always turn off the water supply valve to your toilet before attempting any repairs.
Flapper Valve:
- Remove the flapper: Lift the lid of the toilet tank and locate the flapper at the bottom. Simply unhook it from the flush valve assembly.
- Inspect the flapper: Look for cracks, warping, or mineral buildup. If the flapper is damaged, it’s best to replace it entirely.
- Replace the flapper: Purchase a flapper that’s compatible with your toilet model. Installation is usually straightforward – just hook the new flapper onto the flush valve assembly.
Float Height:
- Locate the float: The float is typically a plastic ball or cylinder connected to the fill valve arm.
- Adjust the height: Most floats have an adjustment mechanism, like a screw or clip. Carefully adjust the height to the level recommended by your toilet manufacturer (this information may be printed inside the tank).
Remember: If you’re uncomfortable with DIY repairs, or if the problem persists, it’s always best to call a PDM professional plumber.
By addressing a running toilet promptly, you can save money on your water bill and conserve this valuable resource. So next time you hear that telltale trickle, don’t hesitate to tackle the problem and keep your plumbing running smoothly!
Call a smiling PDM plumber at 815-390-7095.
4. Don’t Let Your Water Pressure Go Down the Drain!
Ever turn on the faucet and get a trickle instead of a refreshing stream? Low water pressure can be a real drag, making everything from showering to washing dishes a chore. But before you call a plumber, there are a few things you can try to diagnose and fix the problem yourself.
What’s Stealing Your Water Pressure?
Several culprits can cause low water pressure in your home:
- Clogged Aerators: These little screens attached to your faucet heads can trap mineral deposits and debris, reducing water flow. Luckily, they’re easy to remove, clean, and replace.
- Plumbing Blockages: Sediment buildup or corrosion inside your pipes can narrow the passage, hindering water flow. This is more common in older homes with galvanized steel pipes.
- Shutoff Valve Issues: Is a valve partially closed by accident? Check your main shut-off valve and the valve near your water meter to ensure they’re fully open.
- Pressure Regulator Problems: Your home might have a pressure-reducing valve (PRV) to prevent excessively high pressure. A malfunctioning PRV could restrict flow.
Diagnosing Residential Plumbing Problem:
- Single Fixture or Widespread? Turn on faucets throughout your house. If it’s just one faucet with low pressure, the issue likely lies with that specific fixture. If it’s a house-wide problem, the source is probably with the main water supply or pipes.
- Check the Meter: Locate your water meter and look for a small leak indicator. If it’s spinning and no faucet is open, you might have a leak somewhere in your system, stealing pressure.
DIY Fixes Before Calling a Pro:
- Clean the Aerator: This is a simple task! Most aerators unscrew easily with a wrench or pliers. Clean any debris and reattach. And if you have hard water build up, soak in a glass of vinegar.
- Open Shut-Off Valves: Double-check that your main shut-off valve and the valve near the water meter are fully open. Good idea to turn on and off most valves to keep them working. If you don’t they can freeze up and will need to be replaced.
If these easy fixes don’t solve the problem, it’s time to call a licensed plumber. They can diagnose more complex issues like clogged pipes or a faulty PRV and get your water pressure flowing smoothly again.
By understanding the causes of low water pressure and taking some initial steps yourself, you can save time and money in the long run. But remember, when in doubt, consult a professional to ensure your plumbing woes don’t become a major headache!
Call a friendly PDM plumber at 815-390-7095.
5. Clogged Drains and Toilets: Taking Back Control of Your Plumbing
Clogged drains and toilets are a common household woe, but don’t despair! Understanding what causes clogs and how to tackle them can save you time, money, and a whole lot of frustration.
The Usual Culprits: What Clogs Your Pipes?
- Hair: Hair is a superstar drain clogger, especially in showers and bathtubs. It accumulates over time, forming a web that traps other debris.
- Soap Scum: Over time, soap scum can build up on the insides of pipes, causing blockages.
- Grease: In kitchens, grease solidifies as it cools, clinging to pipes and attracting other food particles.
- Foreign Objects: Small toys, jewelry, or other objects accidentally flushed or rinsed down the drain can cause clogs.
DIY Drain Defense: Plungers and Homemade Solutions
Before you reach for the chemical drain cleaner, consider these natural, wallet-friendly methods:
- The Trusty Plunger: For bathtub, shower, and sink clogs, a plunger is your first line of defense. The plunging action dislodges the clog and restores flow.
- Baking Soda and Vinegar: This fizzing duo is a natural de-clogger. Pour a cup of baking soda down the drain,followed by a cup of vinegar. The mixture will fizz and bubble, helping to break down mild clogs. Flush with hot water after the bubbling subsides.
Chemical Drain Cleaners: A Last Resort
Chemical drain cleaners can be effective for tough clogs, but use them with caution:
- Harsh Chemicals: These cleaners contain harsh chemicals that can damage pipes if not used properly.
- Fumes and Splashes: Chemical drain cleaners release harmful fumes and can cause skin and eye irritation upon contact.
- Limited Effectiveness: They may not work on all clogs and can even worsen some blockages by solidifying organic materials.
When to Call in the Pros
If your DIY efforts fail to banish the clog, or if you’re dealing with a frequently clogged drain, it’s time to call a professional plumber. They have the tools and expertise to tackle stubborn clogs and ensure your plumbing is in tip-top shape.
By understanding what clogs your drains and knowing how to address them, you can keep your home’s plumbing running smoothly. Call an experienced PDM plumber at 815-390-7095.
6. Taming the Tank: Troubleshooting Common Water Heater Issues
Our trusty water heaters work tirelessly behind the scenes, ensuring a steady stream of hot water for everything from showers to laundry. But like any appliance, they can encounter problems from time to time. Let’s tackle some typical water heater woes and explore ways to get your hot water flowing smoothly again.
Common Water Heater Issues:
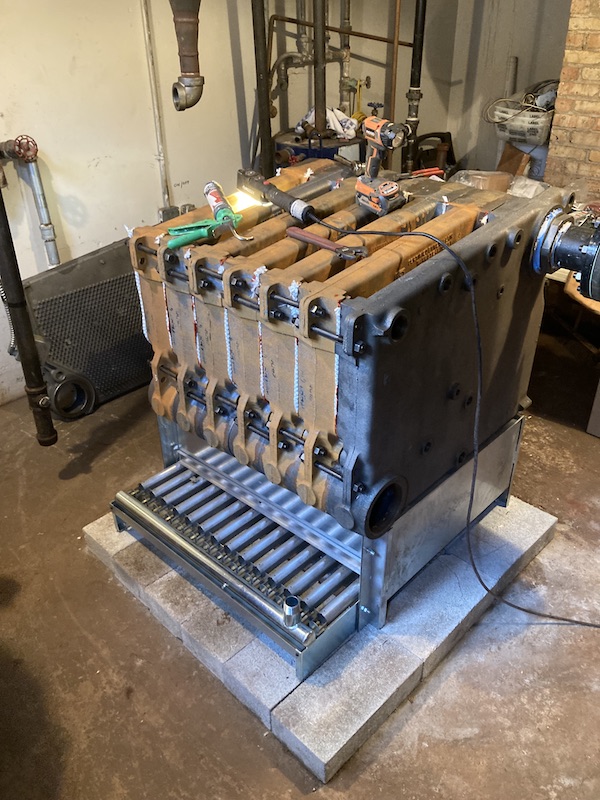
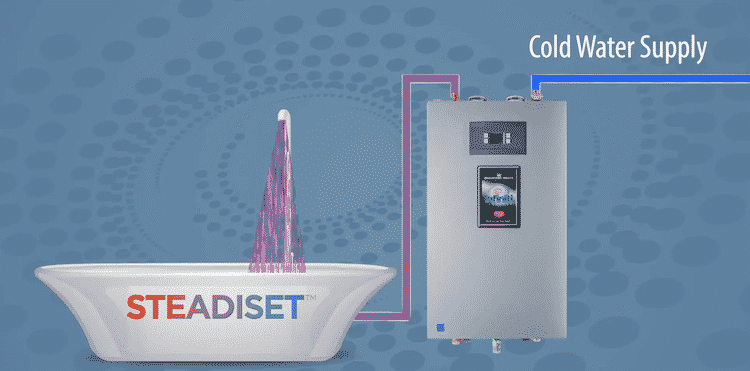
- Lukewarm or Cold Water: This could be caused by a faulty thermostat setting, a malfunctioning heating element,or even a lack of power supply.
- Leaks: Leaks can originate from various points, including the pressure relief valve, loose connections, or a failing tank. A leak requires prompt attention to prevent water damage.
- Unusual Noises: Knocking, rumbling, or popping sounds might indicate sediment buildup in the tank, a malfunctioning heating element, or loose parts.
Basic Troubleshooting Tips:
Before calling in a professional, there are a few DIY checks you can perform:
- Thermostat: Ensure the thermostat is set to your desired temperature (typically around 120°F). You might need to adjust it or, in some cases, replace it.
- Heating Element: If you have an electric water heater, a faulty heating element could be the culprit behind lukewarm water. Replacing the element might be necessary, but consult a professional for this task.
- Reset Button: Some water heaters have a reset button that trips in case of overheating. Try resetting it, but if the issue persists, seek professional help.
Safety First:
Water heaters involve electricity and gas, so safety is paramount:
- Turn Off the Power: Always turn off the power supply to your water heater at the breaker box before attempting any troubleshooting steps.
- Call a Plumber: For any significant leaks, gas-related issues, or electrical concerns, it’s best to call a licensed plumber to ensure safety and proper repairs.
When to Replace Your Water Heater:
While some water heater problems are fixable, others might signal the end of its lifespan. Here are some signs it’s time for a replacement:
- Age: Water heaters typically last 8-12 years. If yours is nearing the end of its lifespan and experiencing frequent problems, replacing it might be more cost-effective than repairs.
- Extensive Leaks: A large leak from the tank signifies a failing unit. Replacing the heater is the best course of action to prevent water damage and ensure safety.
- Rusty or Discolored Water: This indicates rust or sediment buildup within the tank, potentially contaminating your water supply. Replacing the unit is recommended.
For more information on water heaters and finding a qualified plumber, visit PDM Water Heaters.
By understanding common water heater issues and taking these troubleshooting steps, you can keep your hot water flowing and avoid major problems. But remember, safety always comes first. If you’re unsure about tackling a repair yourself, don’t hesitate to call in a PDM professional at 815-390-7095.
7. Don’t Let the Rains Ruin Your Day: Why Sump Pump Maintenance is Crucial
For many homeowners, a basement is a valuable additional living space. But basements are susceptible to flooding,especially during heavy rain seasons. That’s where sump pumps come in – these unsung heroes silently work behind the scenes to keep your basement dry and prevent costly water damage.
Why Sump Pumps Matter
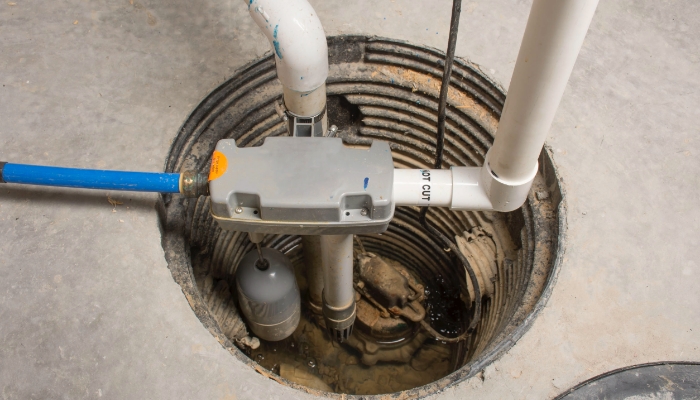
A sump pump is a submersible pump installed in a basement’s lowest point, often within a sump pit. It collects groundwater that seeps in through the foundation walls and flooring. The pump then discharges this water away from your house, preventing flooding and protecting your basement from moisture-related problems like mold and mildew.
Common Culprits of Sump Pump Failure
Even the most reliable sump pump can malfunction. Here are some common issues to watch out for:
- Stuck Sump Pump Switch: The sump pump turns on and off based on a switch that detects water levels in the pit.If the switch gets clogged with debris or malfunctions, the pump won’t activate when needed.
- Power Outages: During heavy rain, power outages are more likely. Without electricity, your sump pump becomes useless.
- Improper Installation: A poorly installed sump pump can be undersized for your home’s needs, have a clogged discharge line, or lack a proper drainage system around the foundation.
Keeping Your Basement Safe: Maintenance Tips
Regular maintenance is key to ensuring your sump pump functions flawlessly during rainy seasons:
- Test Your Pump Regularly: Pour a bucket of water into the sump pit to ensure the pump turns on and discharges water properly.
- Clean the Sump Pit and Pump Switch: Remove any debris like leaves or dirt that could clog the switch and prevent activation.
- Inspect the Discharge Line: Make sure the discharge line is clear of obstructions and leads the water away from your house.
- Consider a Backup Battery System: In case of a power outage, a battery backup system can keep your sump pump running and prevent flooding.
For professional assistance with sump pump repair or replacement, visit our service page: Sump Pump Repair and Replacement
By following these simple maintenance tips, you can ensure your sump pump is in top shape to tackle any downpour and keep your basement dry and safe. Remember, a functioning sump pump is an investment in peace of mind, saving you from potential water damage and costly repairs down the line.
Frequently Asked Questions
Q; How Do You Diagnose Your Plumbing Problems?
Diagnosing plumbing problems can involve some detective work! Here’s a breakdown of how to approach it:
-
Identify the Symptoms: Start by pinpointing the exact issue. Is it a clogged drain, a running toilet, or a leak? The specific symptoms will help narrow down the source of the problem.
-
Visible Inspection: Look for any telltale signs like dripping faucets, damp spots on walls or floors, or low water pressure. This can help determine if the issue is localized or more widespread.
-
Process of Elimination: For some problems, try isolating the issue. For example, if you suspect a clogged drain,see if it’s affecting just one sink or multiple fixtures.
If you’re not comfortable tackling the problem yourself, consider these options:
- Consult a DIY resource: Websites and forums can offer solutions for common plumbing problems.
- Call a plumber: A professional plumber can diagnose the problem quickly and efficiently and have the right tools and expertise to fix it.
Q: What Is The Most Common Problem With The House Sewer Drain?
The most common problem with the house sewer drain is clogs. These can be caused by a buildup of grease, hair, wipes,or other debris that shouldn’t be flushed down the toilet. Symptoms of a clogged sewer drain include slow drains throughout the house, gurgling sounds in the pipes, or even sewage backing up into drains.
Q: How Many Years Does Plumbing Last In A House?
The lifespan of plumbing in a house can vary depending on several factors, including the material of the pipes, water quality, and how well the system is maintained.
- Copper pipes: Generally last 50-70 years or more.
- Galvanized steel pipes: Prone to rust and corrosion, typically lasting 40-50 years.
- Plastic pipes (PVC and PEX): Can last well over 70 years if properly installed.
Regular maintenance, like drain cleaning and addressing leaks promptly, can extend the lifespan of your plumbing drain system. If you notice any signs of trouble, it’s best to address them quickly to avoid more serious problems down the road.
Contact PDM for Proven, Trusted Service
We have a great team of award winning experts who has solutions for commercial and residential plumbing problems. We care and will get you back to normal fast. Phone 815-390-7095 or contact us online.